
Home windows 11 and Home windows 10 work on the Steam Deck now that Valve has formally launched drivers for Microsoft’s working system. It is not so simple as hitting a obtain button, although. On this information, we will present you the right way to set up Home windows on the Steam Deck, each to the interior solide-state drive (SSD) and from a microSD card.
Home windows is not excellent on the Steam Deck, however putting in the OS (or booting from it with a microSD card) may also help flip the Steam Deck right into a laptop computer alternative. We’ll present you the right way to do a full set up to the SSD, in addition to the right way to boot to Home windows from a microSD card. The latter will maintain the unique SteamOS set up intact.
Earlier than diving in, remember the fact that Home windows 11 is not technically supported on the Steam Deck. Home windows 11 requires TPM, and the Steam Deck would not have that enabled. You possibly can nonetheless set up Home windows 11 with the directions under, however chances are you’ll not obtain Home windows updates.
Jacob Roach / Digital Developments
Boot from a microSD card or USB drive
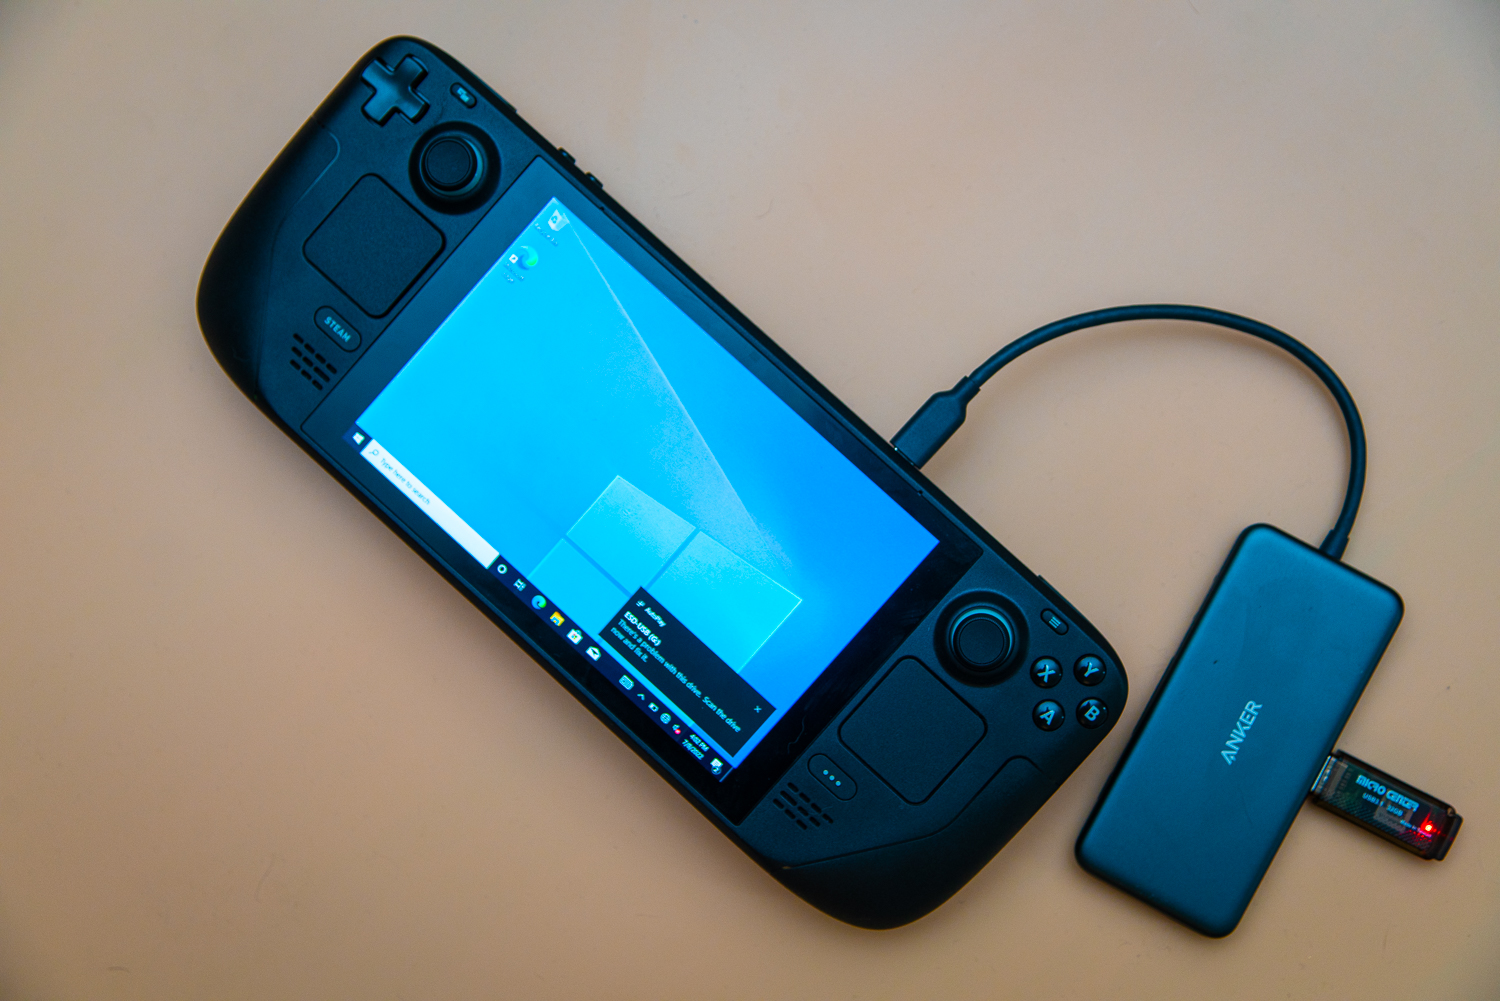
Earlier than really putting in Home windows on the Steam Deck, I like to recommend you boot from a microSD card or USB drive first. That is utterly reversible, so you’ll be able to check out Home windows with out erasing something in your Steam Deck. Home windows is not excellent on the Steam Deck, and reinstalling SteamOS is an enormous job by itself.
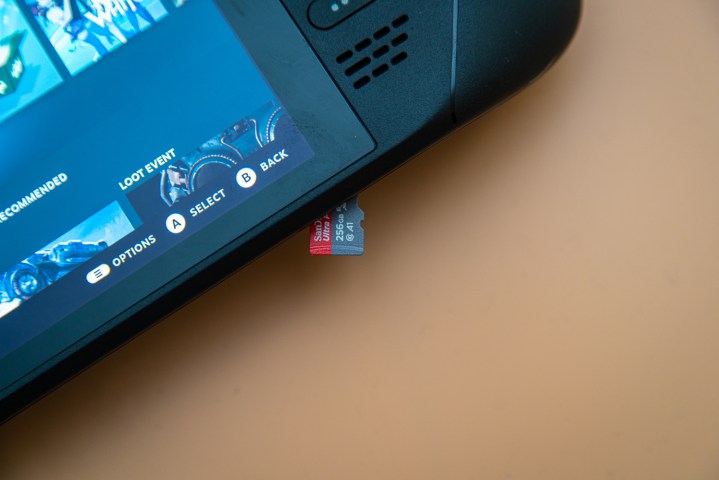
I am utilizing a microSD card, however any UHS-1 microSD card (verify the label) or USB 3.0 drive with at the least 32GB of storage will work. The Steam Deck helps Home windows 10 and Home windows 11, and the method is identical no matter which OS you employ. I am utilizing Home windows 10 right here.
Step 1: Head to Microsoft’s web site and obtain the Home windows 10 media creation device. If you wish to use Home windows 11, obtain the Home windows 11 creation device (beneath Create Home windows 11 set up media).
Step 2: Obtain Rufus, which is what’s going to help you create a bootable model of Home windows in your microSD card or USB drive.
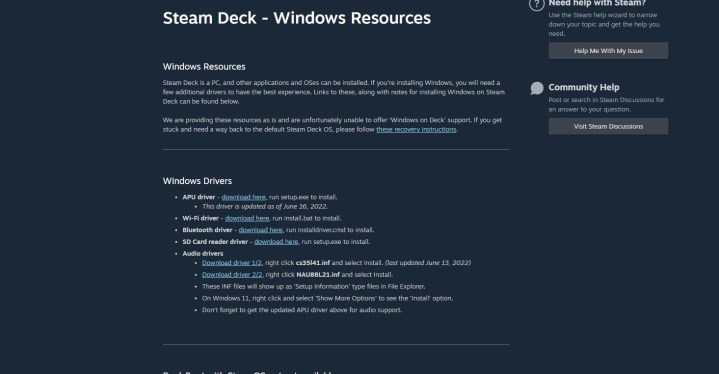
Step 3: Obtain the Home windows drivers for Steam Deck from Valve. Put all of them in a folder collectively on a spare USB drive for entry later.
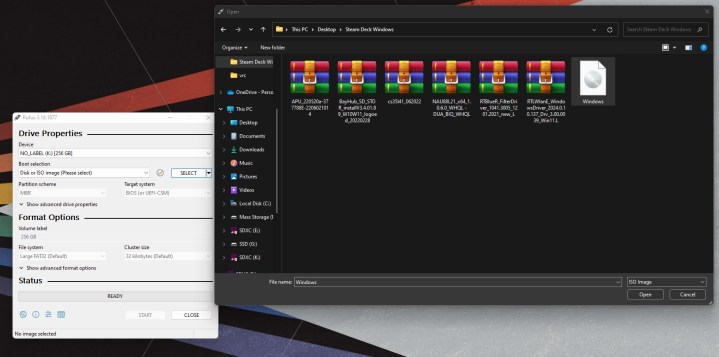
Step 4: Open the Home windows Media Creation Instrument and choose Create set up media. On the subsequent web page, select ISO file, and select a spot to retailer it in your PC. Wait till the method is completed, and ensure to maintain a notice about the place you saved the ISO.
Step 5: Plug in your microSD card or USB drive and open Rufus. Word: Persevering with right here will erase all information in your microSD card/USB drive. In Rufus, choose your microSD card or USB drive beneath System. Then, select Choose subsequent to the Boot choice part. Navigate to your Home windows ISO that you just created earlier.
Below Picture possibility, choose Home windows To Go. Then, select MBR beneath Partition scheme. Rename the drive in order for you, and choose Prepared to start out the flashing course of.

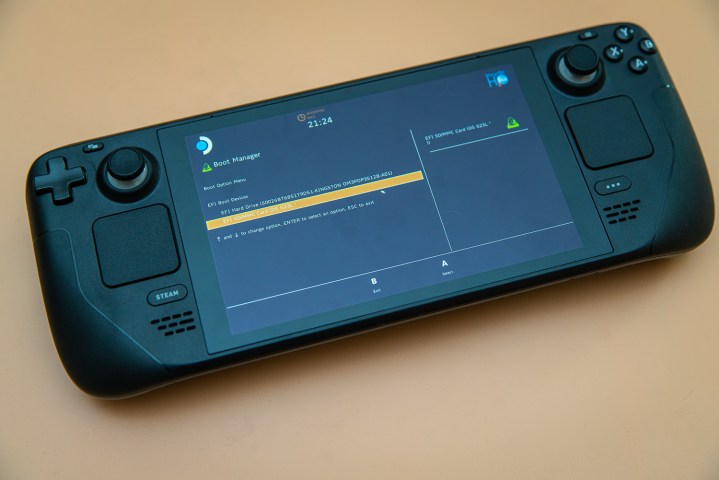
Step 6: As soon as it is finished, eject the microSD card and insert it within the Steam Deck. Flip off your Steam Deck utterly, after which maintain down the Quantity down button as your energy it on. It will enter the boot supervisor.
Jacob Roach / Digital Developments
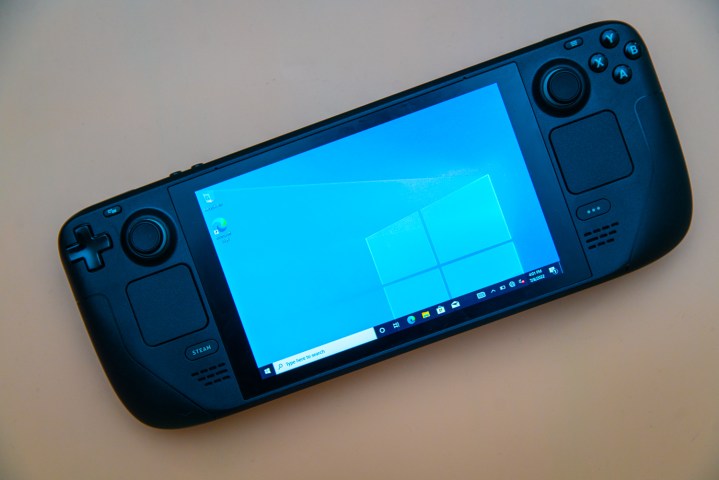
Step 7: Choose your SD card besides into Home windows. It can boot in portrait mode on the Steam Deck.
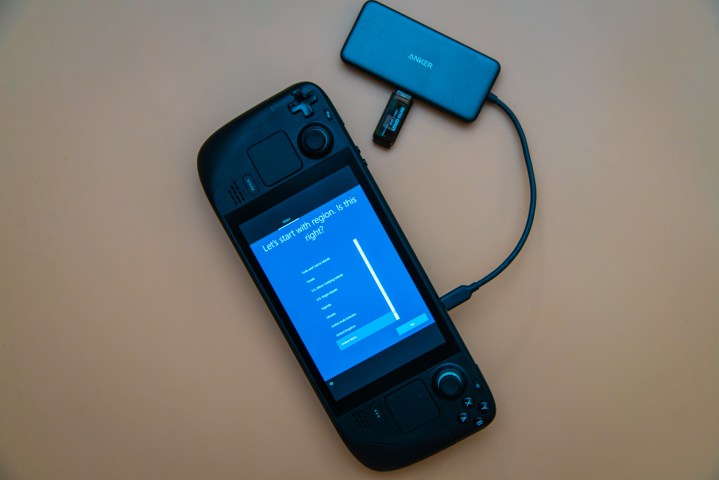
Home windows would not really set up right here, so proceed by way of the setup course of as regular by deciding on your language, keyboard format, and many others. A keyboard and mouse assist lots right here, however you may get by way of the setup with simply the touchscreen.
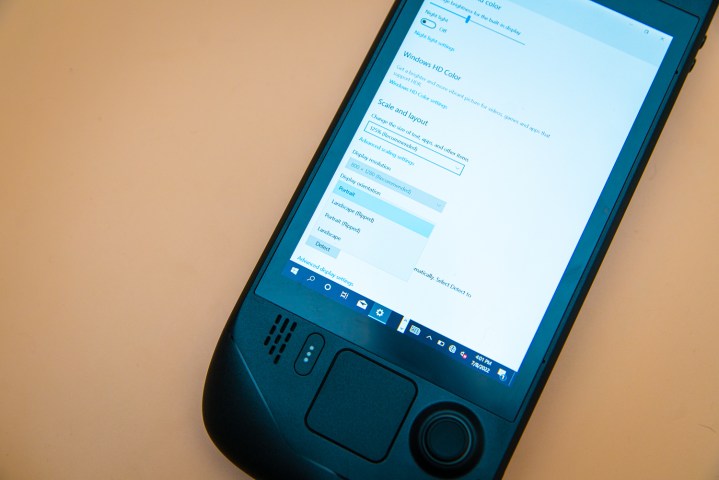
Step 8: When you’re in Home windows, head to Settings > System > Show and discover the Show orientation possibility. Choose Panorama to flip the display to the right orientation.
Jacob Roach / Digital Developments
Step 9: Lastly, plug within the USB drive that you just saved the Home windows drivers on. Plug it in utilizing your USB-C hub (in a roundabout way into the Steam Deck) and set up the drivers.
That is it. If you reboot your Steam Deck, it’s going to return to SteamOS, however you’ll be able to at all times boot into Home windows supplied you undergo the boot supervisor.
Do not combine up this course of with twin booting. The Steam Deck would not help twin booting for the time being, so you will want to decide on both Home windows or SteamOS in order for you a everlasting resolution.

Jacob Roach / Digital Developments
Easy methods to set up Home windows on the Steam Deck’s SSD
In order for you Home windows solely on the Steam Deck, you’ll be able to set up it on to the SSD. You will have to erase the entire information on the SSD to take action, although, together with your video games, settings, and SteamOS itself. Valve has promised a local dual-booting possibility with a future SteamOS 3 launch, however this hasn’t arrived but.
It is potential to revive SteamOS on the Steam Deck, however it is a bit of a trouble. In the event you simply need to experiment with Home windows, use the tactic above. In the event you’re prepared to dive into the complete expertise and do not thoughts deleting your information, proceed on.
Word:
Step 1: To start out, it’s essential to create a Home windows set up drive. We define how to try this in our information on the right way to set up Home windows 11, however the course of is simple.
Obtain the Home windows media creation device and create an installer in your USB drive. You will want a USB drive with at the least 16GB of storage, however the device will stroll you thru the steps in any other case.
Step 2: Energy down your Steam Deck utterly and join your USB drive with a USB hub. Though you’ll be able to join the drive immediately, I strongly advocate connecting it with a USB-C hub to keep away from any points. A keyboard and mouse are good for set up, too, and a USB-C hub will help you join these peripherals.
Step 3: Energy on the Steam Deck whereas holding the Quantity down button to enter the boot supervisor. Choose your USB drive with the Home windows installer to proceed.
Jacob Roach / Digital Developments
Step 4: Like earlier than, Home windows will boot in portrait mode. Choose the Home windows model you need after which select Set up now. I extremely advocate connecting a keyboard and mouse right here. You may get by way of set up with the touchscreen, however the Steam Deck’s keyboard and the touchpads will not work.
You will be requested to activate Home windows after. Enter your product key when you’ve got it, or select I haven’t got a product key to proceed.
Step 5: On the next display, select Customized: set up Home windows solely. You will have to delete partitions on the Steam Deck to be able to set up Home windows.
Vital: It will delete all of the info in your Steam Deck, together with your video games, settings, and any saves/media that have not been uploaded to Steam Cloud. It is potential to revive SteamOS later, however you will have to reinstall all your video games and reconfigure your settings.
Step 6: Select a partition you need to delete and choose Delete. I like to recommend selecting the most important of how ever many partitions you’ve got. The 512GB mannequin, at the least, comes with eight partitions.
Step 7: Select the partition you deleted, which ought to present up as Unallocated area, and choose Subsequent. Home windows will start putting in on the drive.
Step 8: After a little bit of time and an automated reboot, you will load into the conventional Home windows setup. Proceed as you’d above, deciding on your keyboard format, and language, and skipping the Wi-Fi part.
Jacob Roach / Digital Developments
Step 9: Home windows is put in at this level, so all you want is a little bit of cleanup. Head to Settings > System > Show and change Show Orientation to Panorama.
Seize one other USB drive with the Home windows drivers for Steam Deck, and set up them as nicely. SteamOS is gone now, so you will want to revive it if you wish to return.
Easy methods to recuperate SteamOS on the Steam Deck
In the event you put in Home windows on the Steam Deck’s SSD and also you need to return, you’ll be able to. Valve presents a Steam Deck restoration picture that may get SteamOS again in working order — supplied you are OK with manufacturing facility resetting your Steam Deck as soon as once more.
Step 1: To start out, obtain the SteamOS restoration picture from Valve.
Step 2: Obtain Rufus on a separate Home windows PC and insert a USB drive. Write the SteamOS restoration picture to the USB drive and eject it out of your PC.
Step 3: Energy down the Steam Deck utterly and join the USB drive utilizing a USB-C hub. Maintain the Quantity down button whereas powering on the Steam Deck to enter the boot supervisor. Choose your USB drive from there (it must be “EFI USB System”).
Step 4: After a while, you’ll boot into the restoration atmosphere. There are just a few choices right here that may try to protect your information, however I like to recommend utilizing the Re-image Steam Deck possibility.
In the event you’re coming from Home windows, you will have to manufacturing facility reset the Steam Deck to get it working. Trying the opposite choices will not maintain your video games in case you’ve already put in Home windows, they usually might result in some nasty file system conflicts.
Troubleshooting Home windows on Steam Deck
-
In case you are putting in internally, make it possible for the partition you select is formatted as NTFS. In any other case, it is probably not appropriate with Home windows.
-
Some video games will simply run higher in Steam OS than they may in Home windows, particularly with workaround strategies. In case you are working into efficiency points along with your recreation, it may very well be Home windows: Chances are you’ll need to use our steps to revert to SteamOS.
-
Your video games might must be booted by way of Steam on Home windows to make use of the Steam Deck management pad. There’s additionally the SWICD workaround for video games that are not on Steam, however that is an additional step and customization course of you will must find time for.
-
Compatibility with audio drivers could also be restricted. Utilizing Home windows 11 and its newest updates is the easiest way to make sure you do not run into audio points.
-
For frequent Home windows use on the Steam Deck, we extremely advocate switching to a conveyable SSD as a substitute of a microSD card
Editors’ Suggestions
/cdn.vox-cdn.com/uploads/chorus_asset/file/25338407/3_Body_Problem_n_S1_E3_00_34_33_04RC.jpg_3_Body_Problem_n_S1_E3_00_34_33_04RC.jpg)


